 English
  中文 (中国)
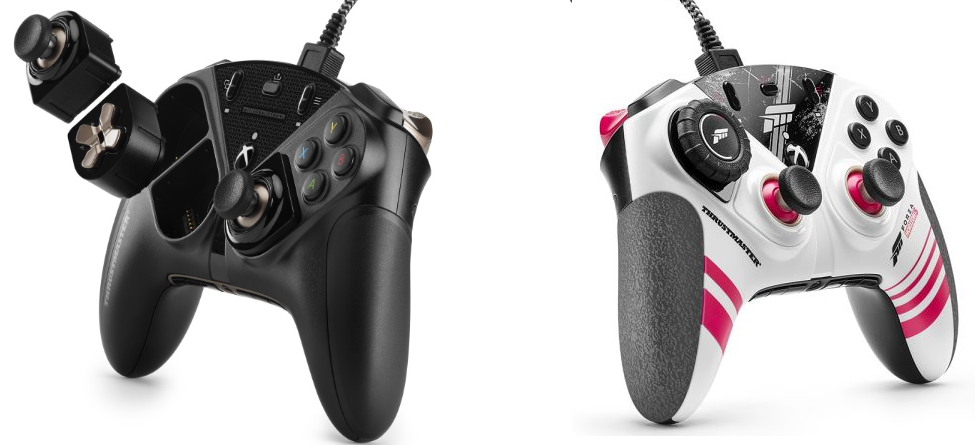
Platforms:
PC natively running Windows® 10/11 or more recent
Game consoles: Xbox One™, Xbox Series X™, Xbox Series S™
This article shows you the steps for calibrating the mini-sticks for the Eswap X range controllers. Calibration lets you to optimize the precision and settings of your mini-sticks both physically and in your game.
- It lets you re-centre the mini-sicks of all types (SH5, S5, S2).
- For S5 or S2 type mini-sticks, it helps you fix drift.
Calibration can be done by connecting your Eswap X or Eswap XR to a PC or an Xbox console.
Note about Firmware:
To perform mini-stick calibration, your Eswap X or Eswap XR must be up to date with at least firmware version v79.00.
If necessary, check or update with ThrustmapperX.
The firmware update can only be done by using a PC. Our article may help you: How can I update my gamepad (Eswap X range, Eswap S or Heart Controller)?
/! IMPORTANT
Rotate BOTH mini-sticks during the calibration process (one after the other or both at the same time provided BOTH are rotated during the procedure), as, otherwise, the mini-stick that stayed idle will have a faulty calibration.
If you are using SH5 HALL STICK mini-sticks, make sure that you reset your mini-sticks before performing calibration and adjustments (see the Mini-Sticks tab in ThrustmapperX).
If your controller is an Eswap X 2 or an Eswap X 2 Elden Ring, go to this article: Eswap X 2 - How to calibrate the mini-sticks
1- To get started, your Eswap X or Eswap XR must be disconnected from the USB port.
2- Press and hold “X” and “B” buttons.
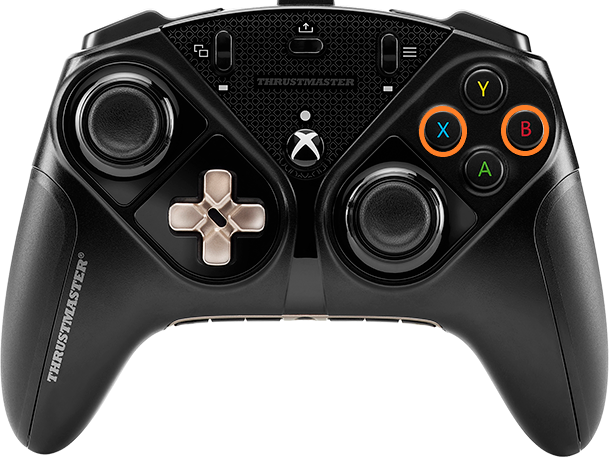
Connect your Eswap X or Eswap XR to a USB port on the PC or an Xbox console by holding down the X and B buttons.
Then release the X and B buttons.
The Xbox white LED must flash.

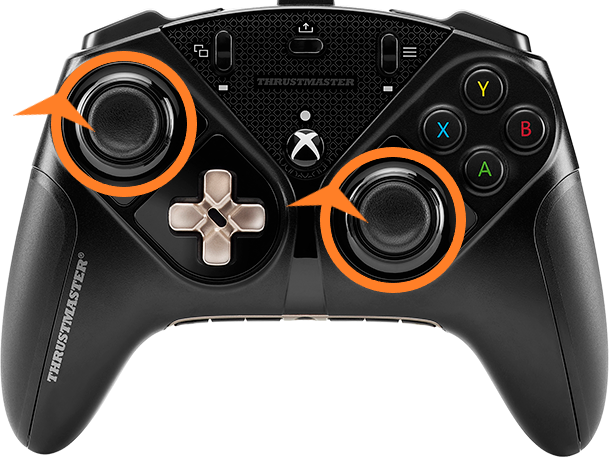
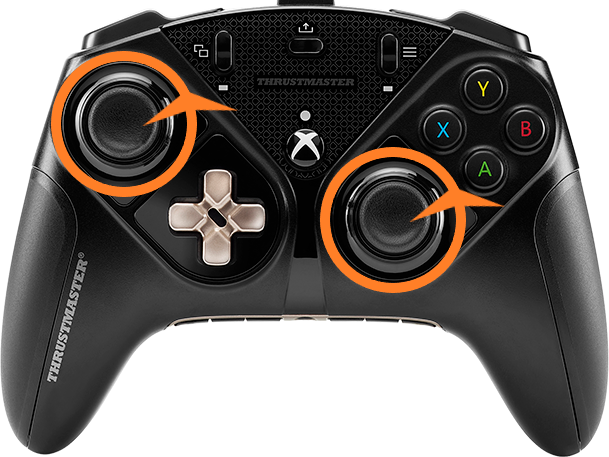
3- Press down each mini-stick button once.
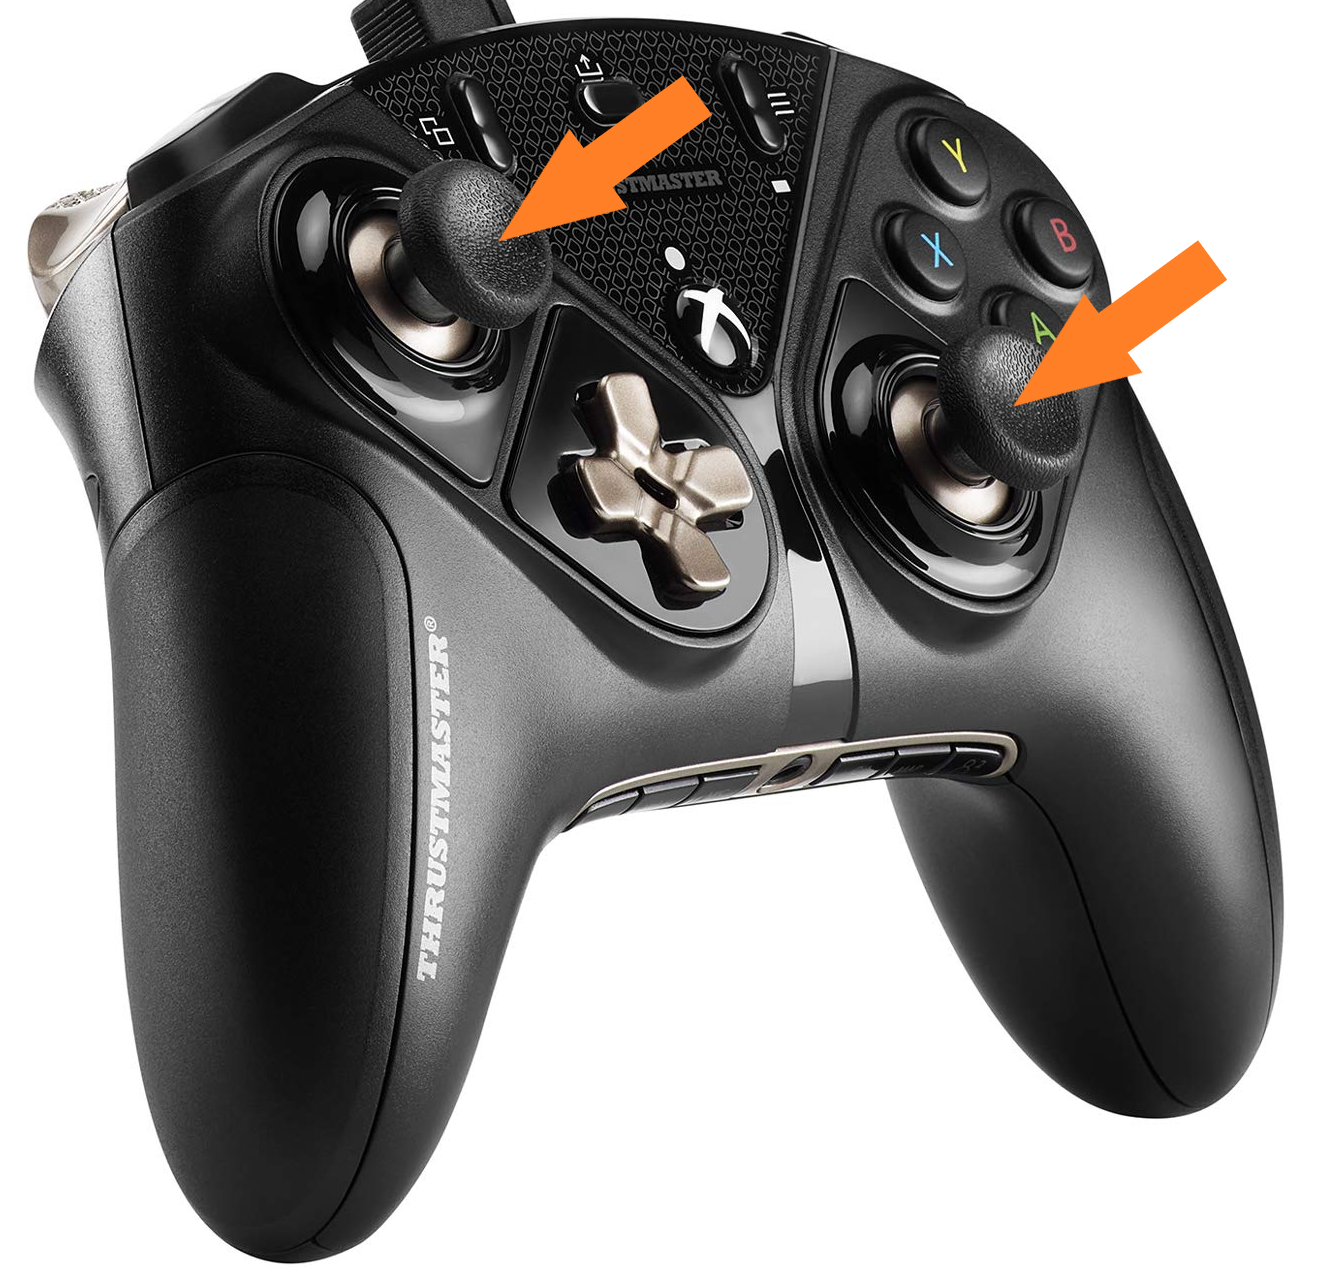
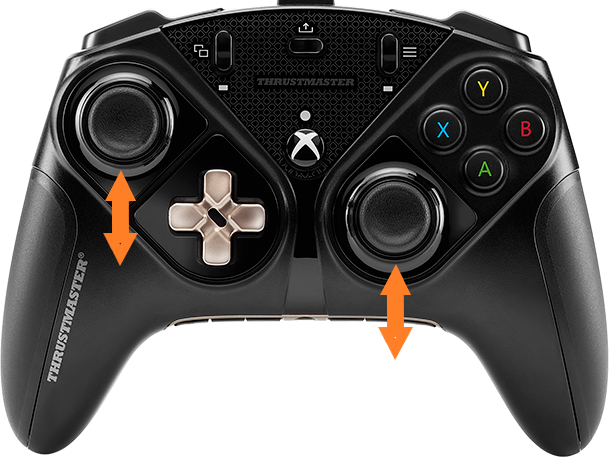
4- Ensure that both mini-sticks are in rest position: tilt each mini-stick up to touch the casing then release.
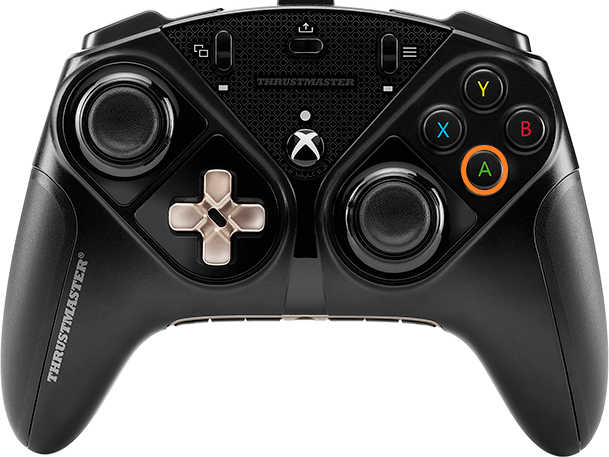
5- Press “A” button to save the center value.
The Xbox white LED and the two white LEDs on the right and left flash faster.
6- Rotate both mini-sticks 3 times clockwise then 3 times counterclockwise.
3 times clockwise.
3 times counterclockwise.
7- Press “A” button to save the calibration.
The Xbox LED starts flashing slowly again: calibration is saved.
8- Press "Y" button to complete the calibration.
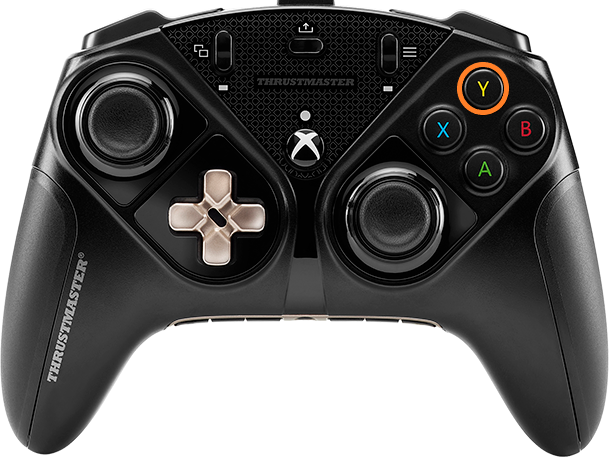
The Xbox white LED and the white LED on the left light up without flashing.
9- Disconnect and reconnect the USB cable
You are ready to play!