 English
  中文 (中国)
System requirements: PC natively running Windows® 10/11 or more recent.
This article focuses on the configuration of a flight simulation device when creating a Basic profile in TARGET GUI software.
A Basic profile is an easy-to-use method to create a personalized profile in TARGET GUI software by easily configuring axes, creating your own button mapping and emulating keyboard events on your flight simulation device.
This article relates to the step Configure your device in our article T.A.R.G.E.T: first steps and getting started
Contents:
1- Create a new configuration file
2- Select your device
3- Configure axes
4- Associate buttons with events
5- Configure additional devices
6- Test your configuration before saving
7- Save your configuration
1- Create a new configuration file
Important: you can create a new configuration profile without the physical devices connected to the PC. But if you want to run and test the devices during configuration, it will be mandatory to have all devices connected to have their physical inputs.
To have your physical devices detected, close TARGET, connect your devices to your PC and open TARGET again.
In MY CONTROLLERS click the NEW CONFIGURATION tab.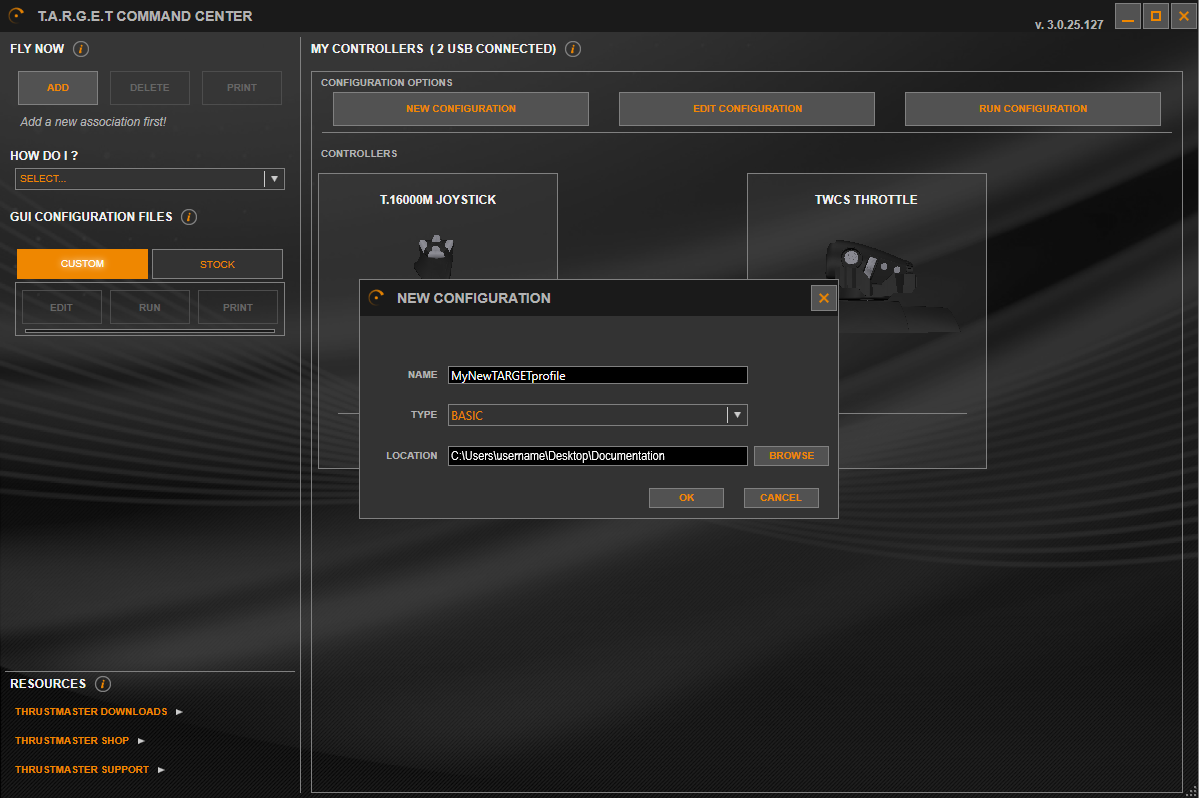
In the NEW CONFIGURATION window:
- NAME: give a name to your profile
- TYPE: BASIC
- LOCATION: save your profile on your PC
Click OK.
2- Select your device
All the products that are supported by TARGET are displayed in this menu.
You can configure your devices without them connected to your PC. If a device is connected to the PC, it is marked “CONNECTED”
Several devices can be configured at the same time.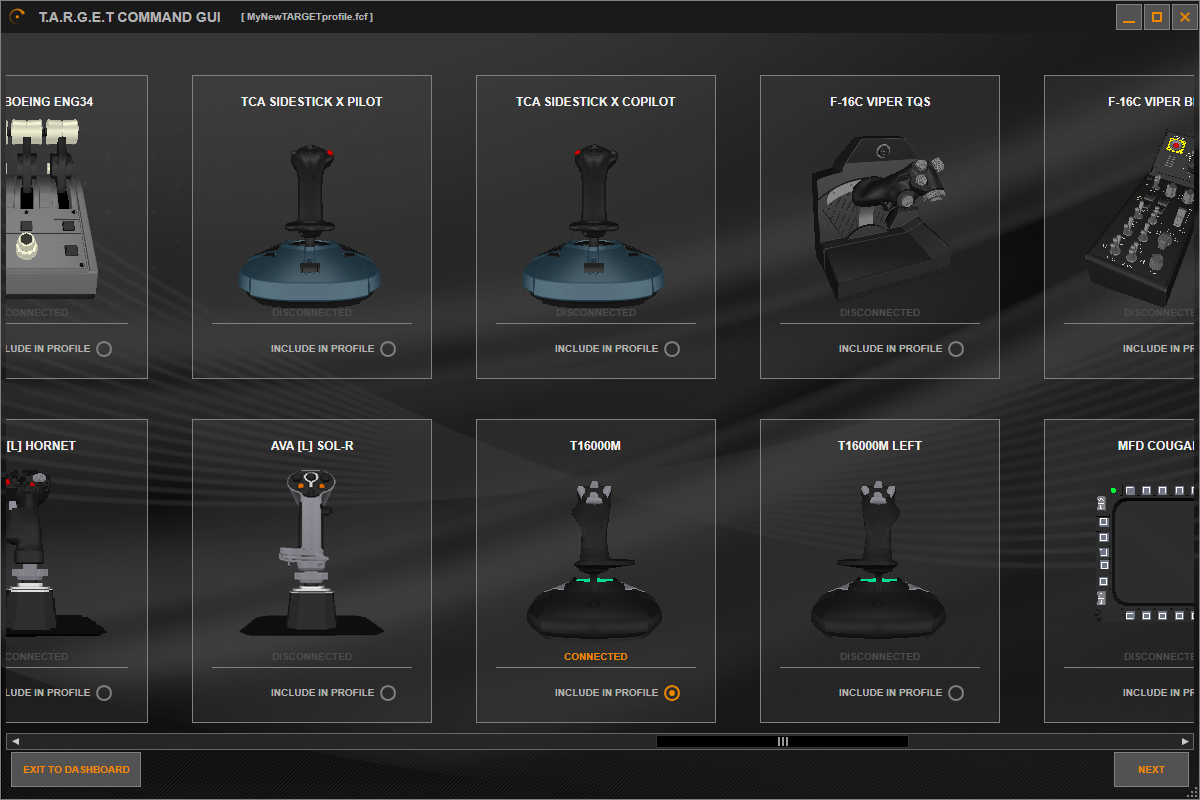
Click INCLUDE IN PROFILE for each device you want to configure.
Click NEXT.
3- Configure axes
In CONFIGURE AXES MAPPING all the selected devices are on display.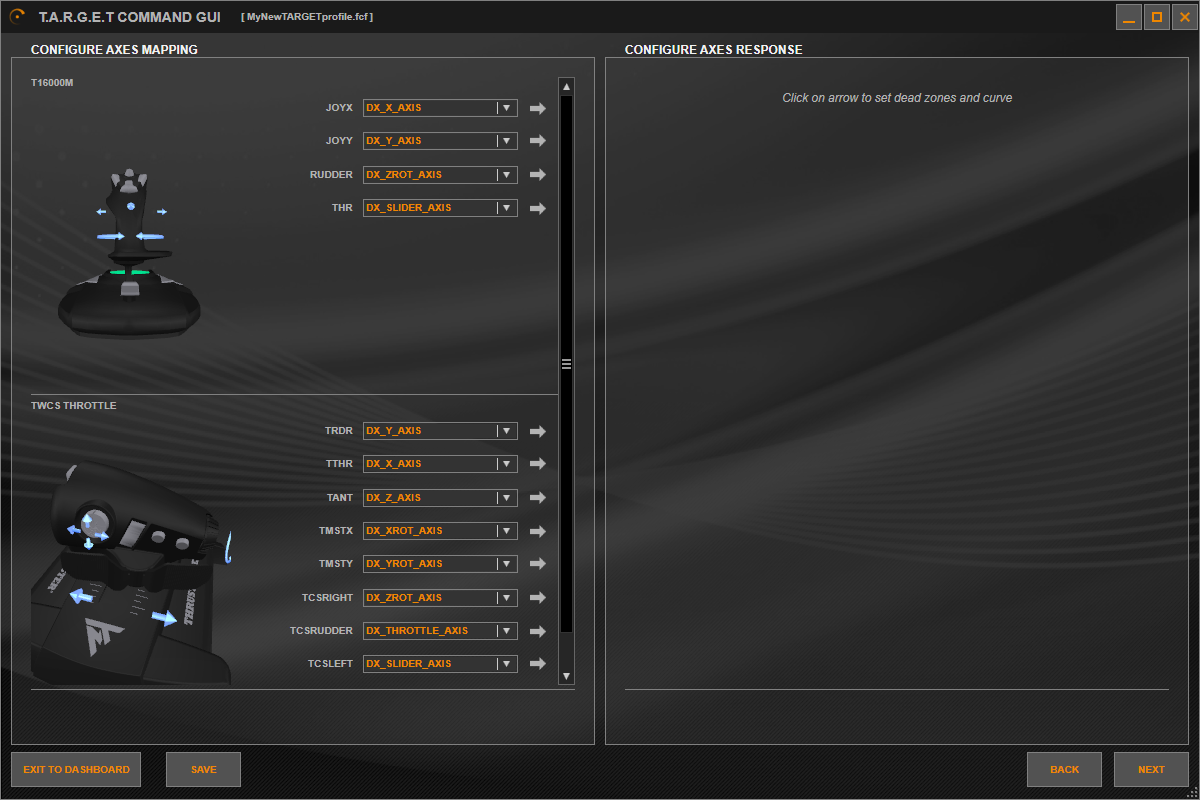
You can modify and reassign each axis.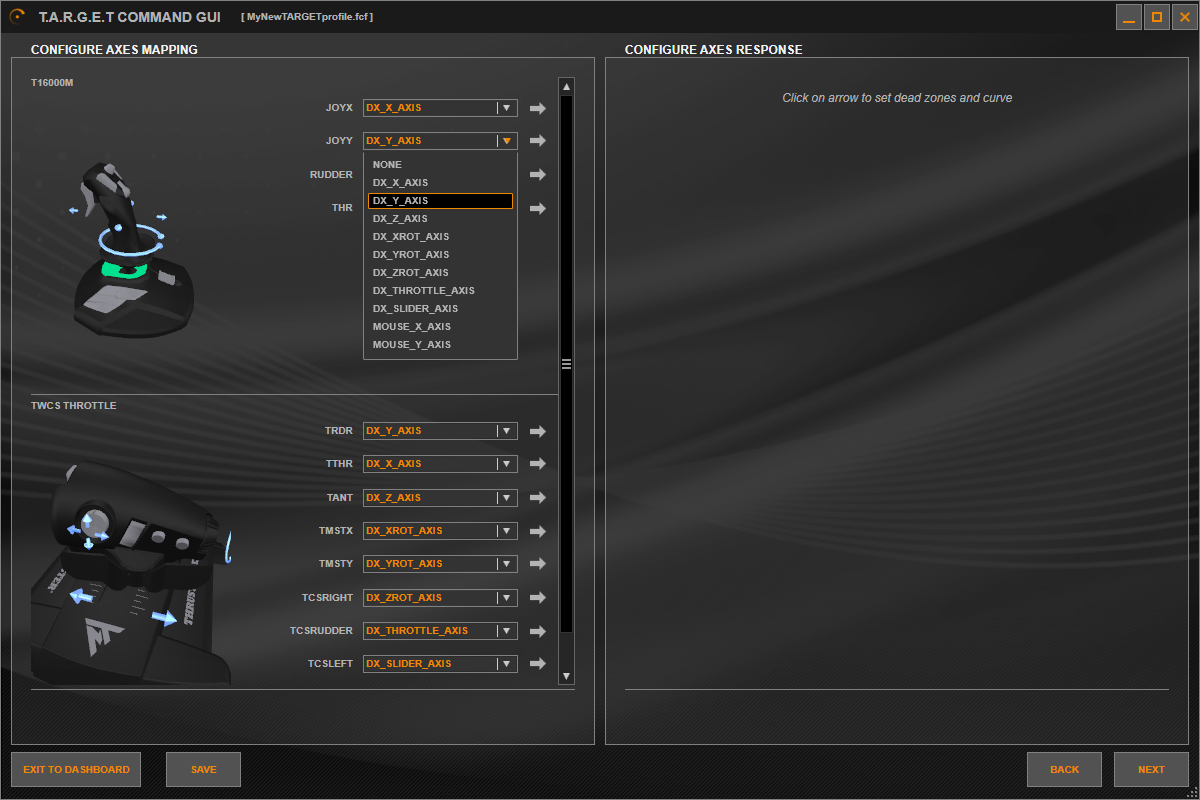
Important: DirectX standards limit the virtual device generated by TARGET to 8 axes.
TARGET converts your physical devices (whether you configure one, two, three, or more devices) into a single virtual device. This virtual device will use the eight axes allowed by DirectX standards (and no more).
So be sure to distribute this maximum of eight axes across all your physical devices.
The list of the eight Axes names (in DirectX and Script) is available in the user manual on page 13
In CONFIGURE AXES RESPONSE configure the curves and dead zone of each axis.
Press the arrow by each axis to set the CONFIGURE AXIS RESPONSE tab.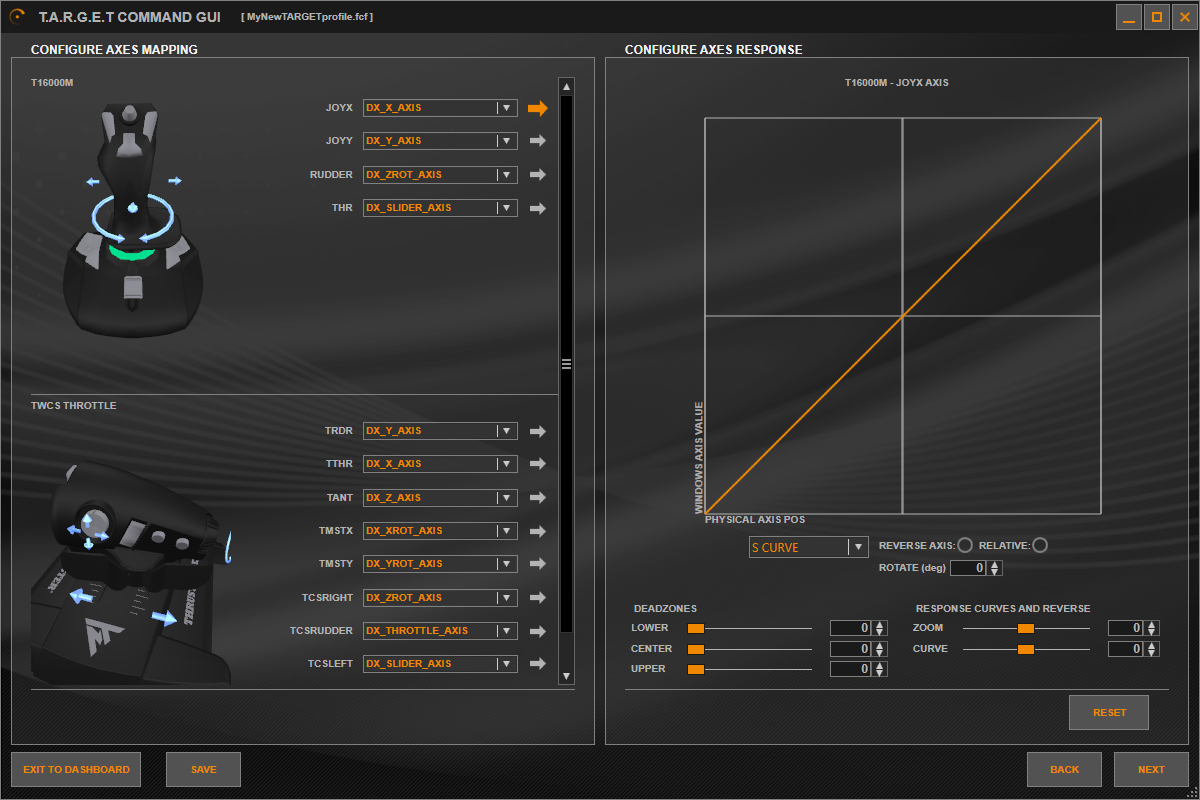
Note: More detail is available in the user manual from page 15
Click NEXT.
4- Associate buttons with events
In SELECT CONTROL you can select a button by using the 3-dimensional representation. Drag and drop a button or axis to ASSIGN PARAMETERS.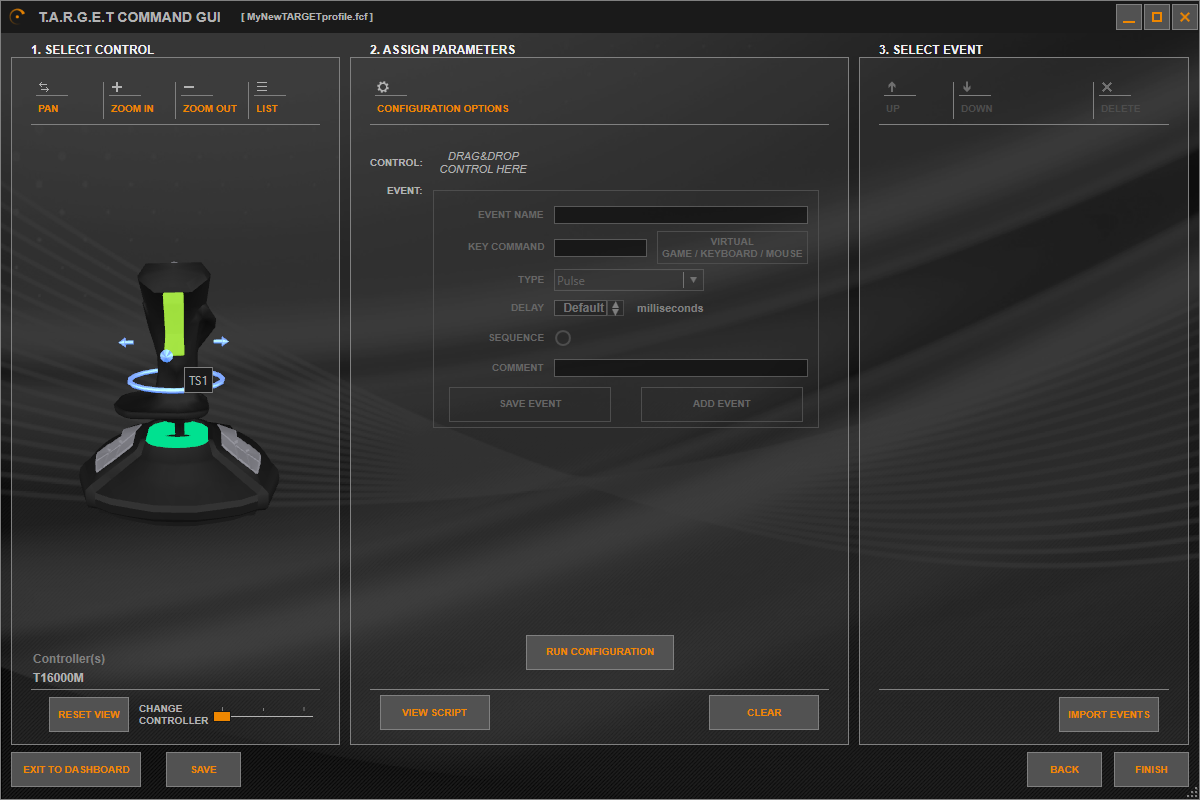
Note: To see all available buttons and axes and the corresponding buttons on your device, in SELECT CONTROL, click List.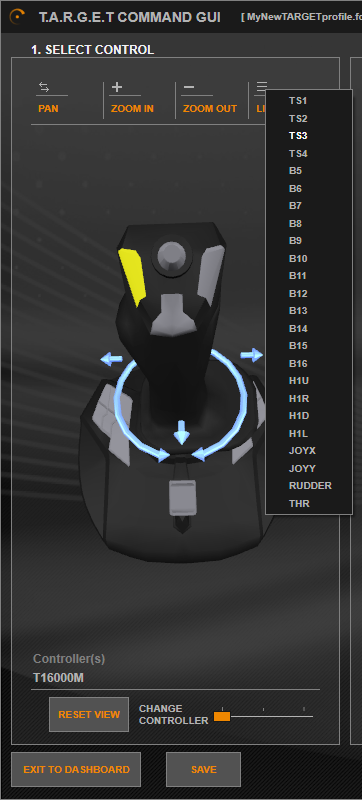
In ASSIGN PARAMETERS you can determine the actions you want to assign.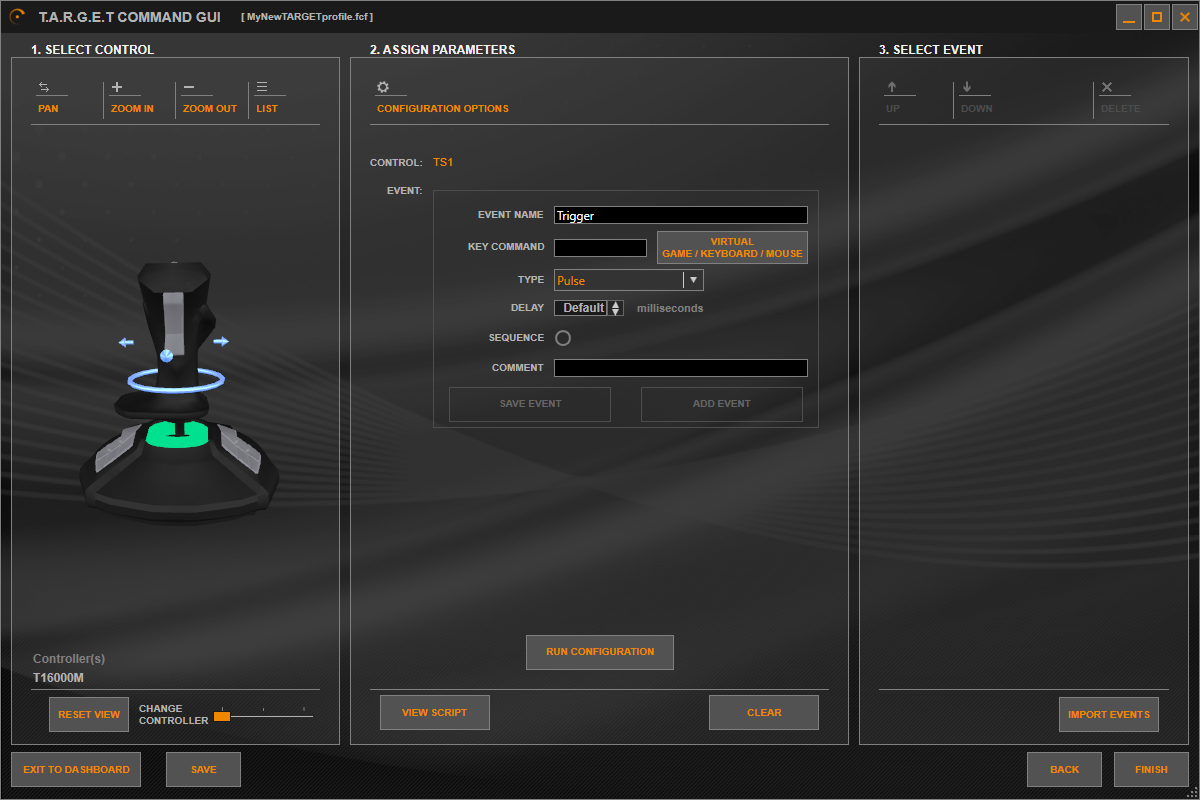
By clicking VIRTUAL GAME / KEYBOARD / MOUSE, you can emulate keyboard events on your device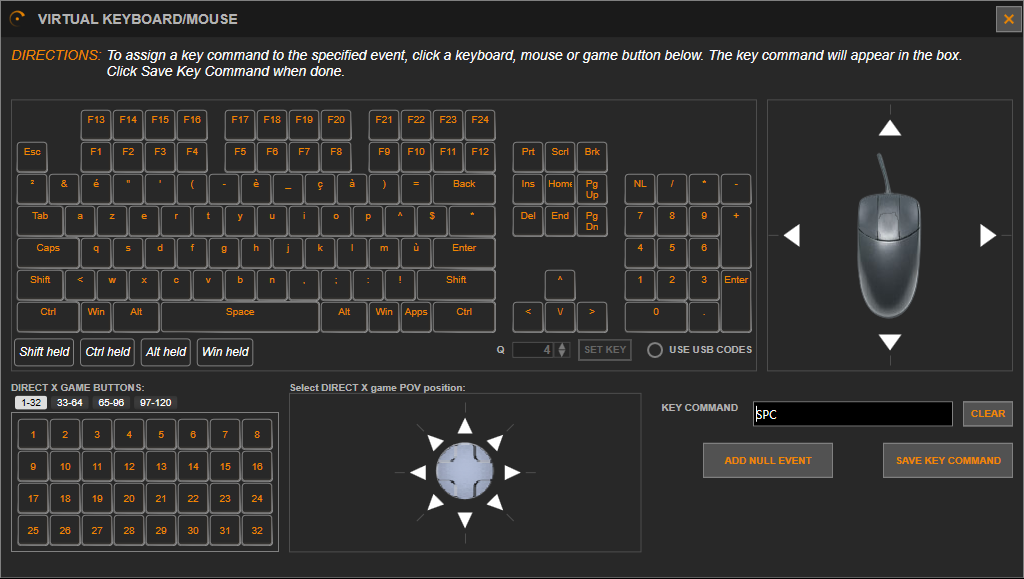
In SELECT EVENT you will see a tree structure of all the functions and buttons you have assigned.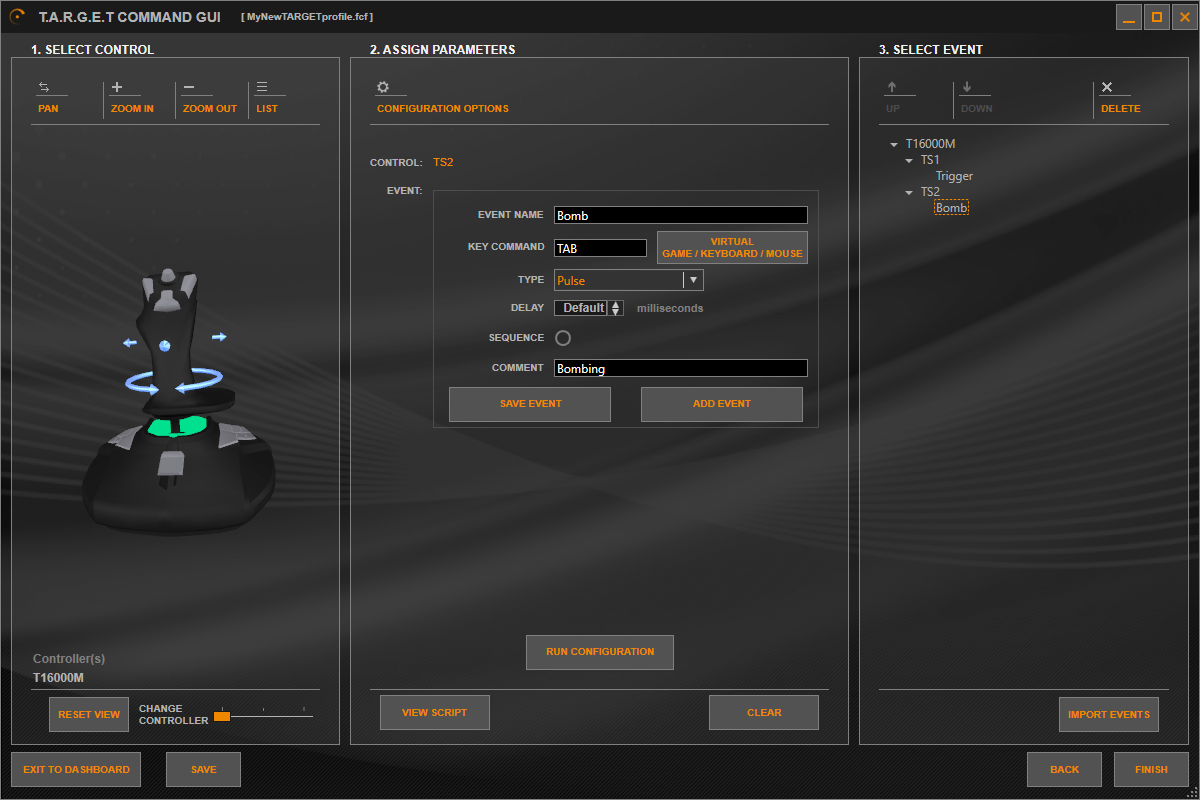
All the details about the association of buttons with events is in the user manual from page 21
5- Configure additional devices
To configure the second device (or the third, fourth, etc…), in SELECT CONTROL, move the CHANGE CONTROLLER cursor. Then follow the steps to configure its axes and buttons.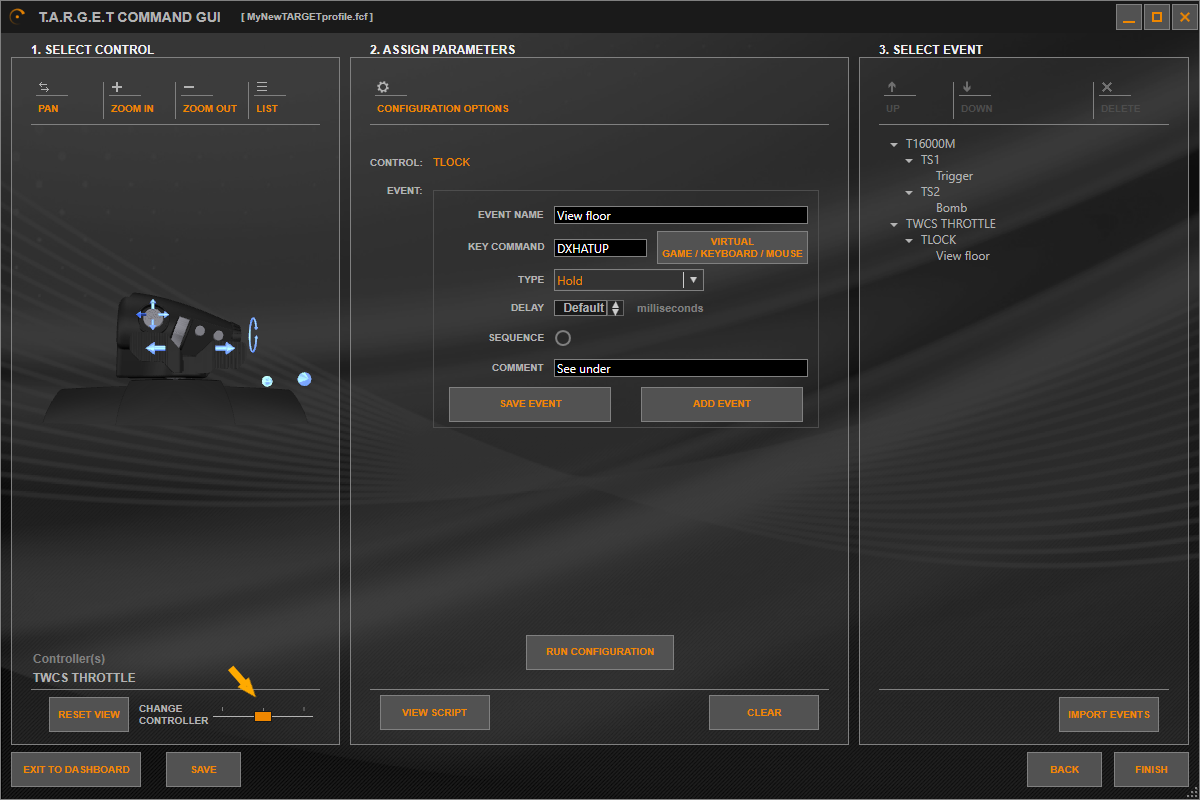
6- Test your configuration before saving
You can test the virtual device when making your configuration.
Important: for testing your profile, all the physical devices must be connected to the PC.
If your physical devices were not connected during the configuration, click Finish and save your profile. Close TARGET, connect your devices to your PC and open TARGET again. Then come back to your profile.
In ASSIGN PARAMETERS click RUN CONFIGURATION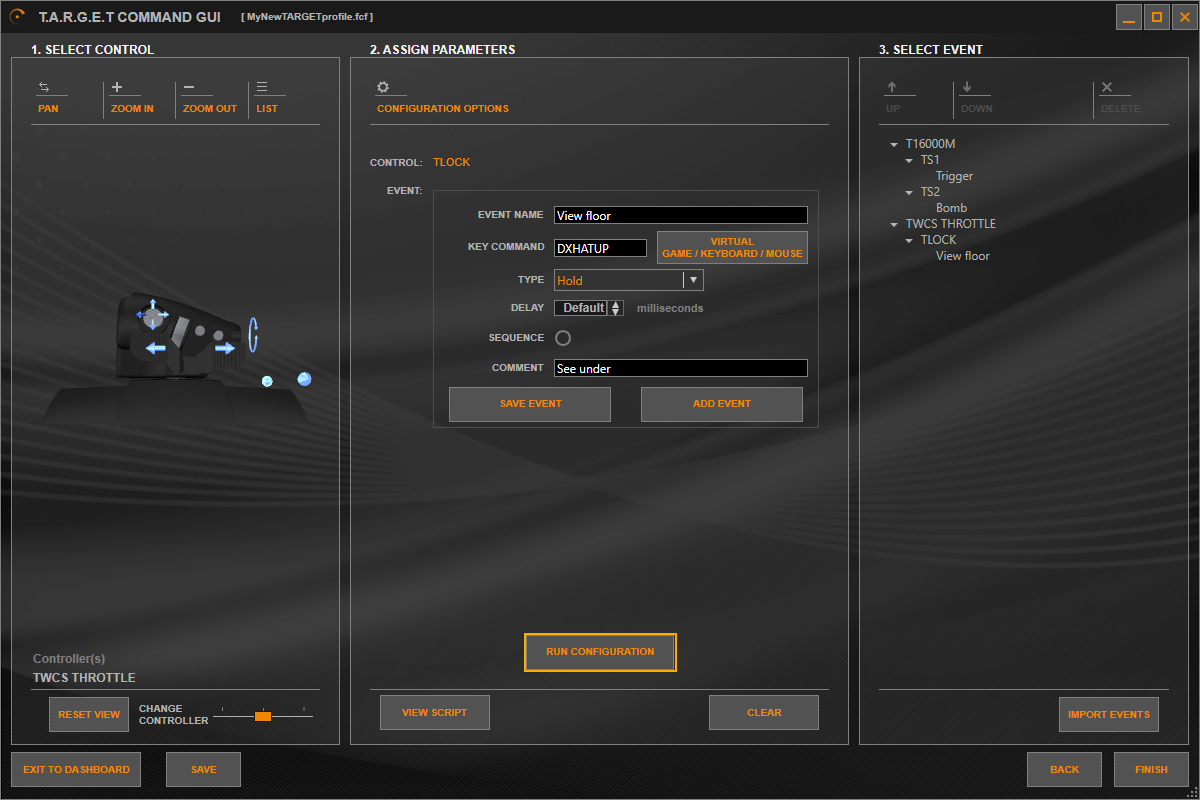
The TARGET GUI Run window opens. Let the launch operate until the TEST TOOLS tabs turn orange coloured.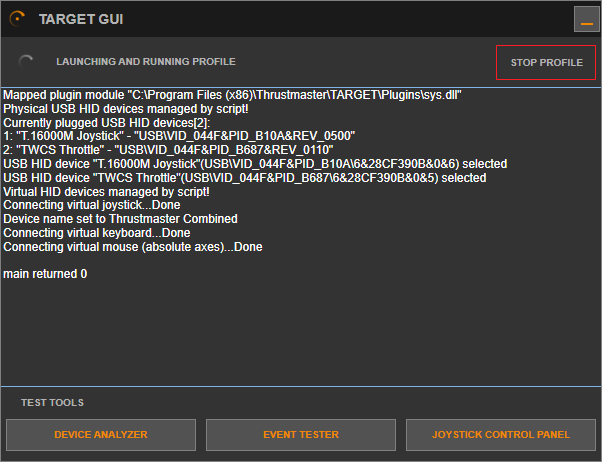
- Click DEVICE ANALYZER to test the axes and buttons in TARGET.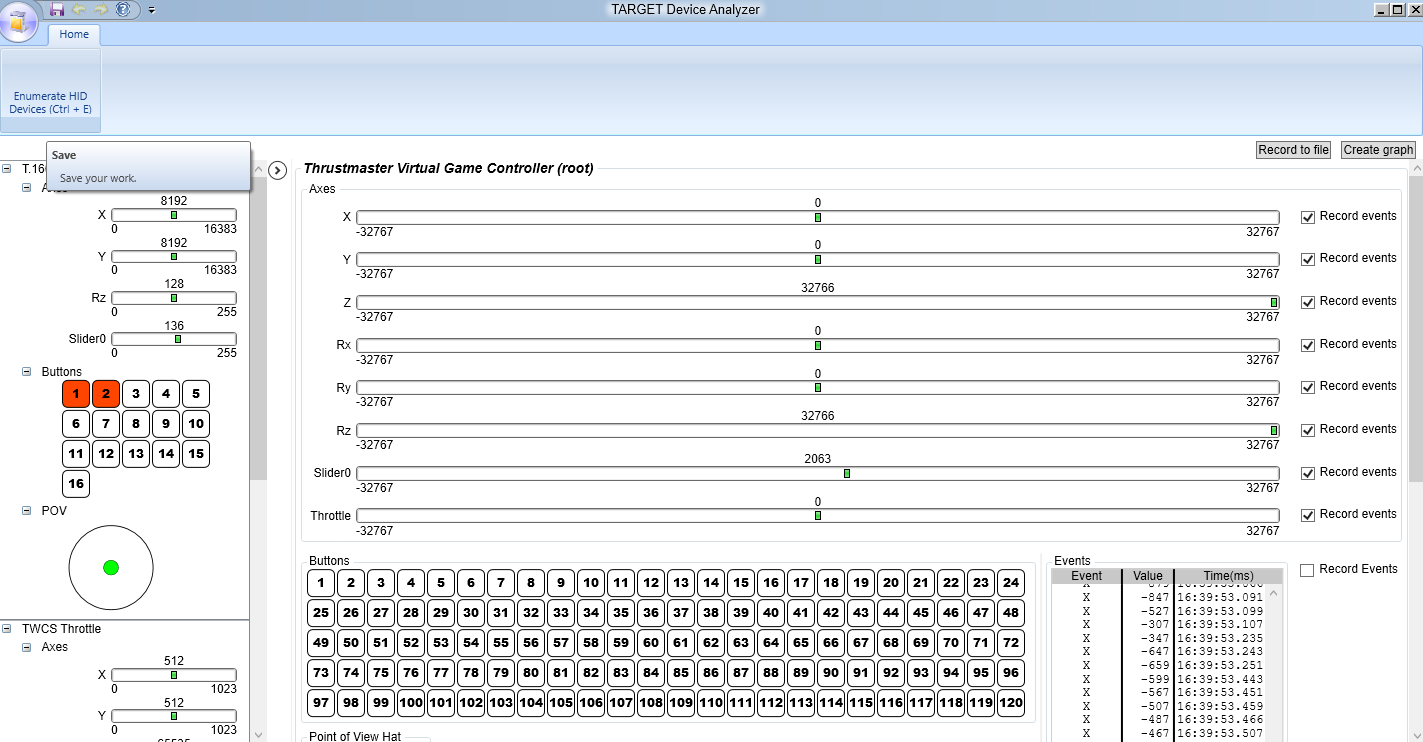
- Click EVENT TESTER to test the keyboard events generated by your configuration.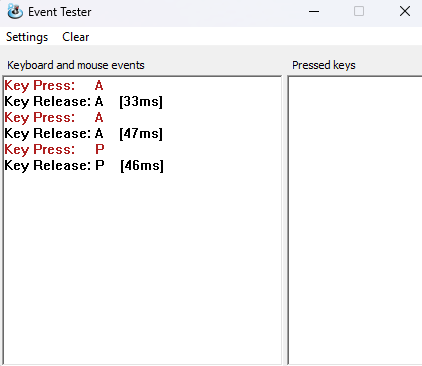
- Click JOYSTICK CONTROL PANEL to open the windows control panel and test the virtual device that your configuration has generated. All the devices are named as a single virtual device: Thrustmaster Virtual Game Controller (root)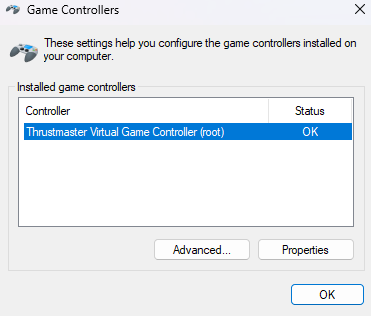

When you have finished testing, in the TARGET GUI RUN window click STOP PROFILE to get back to TARGET COMMAND CENTER
7- Save your configuration
When you are ready, click FINISH then click YES to EXIT CONFIGURATION FILE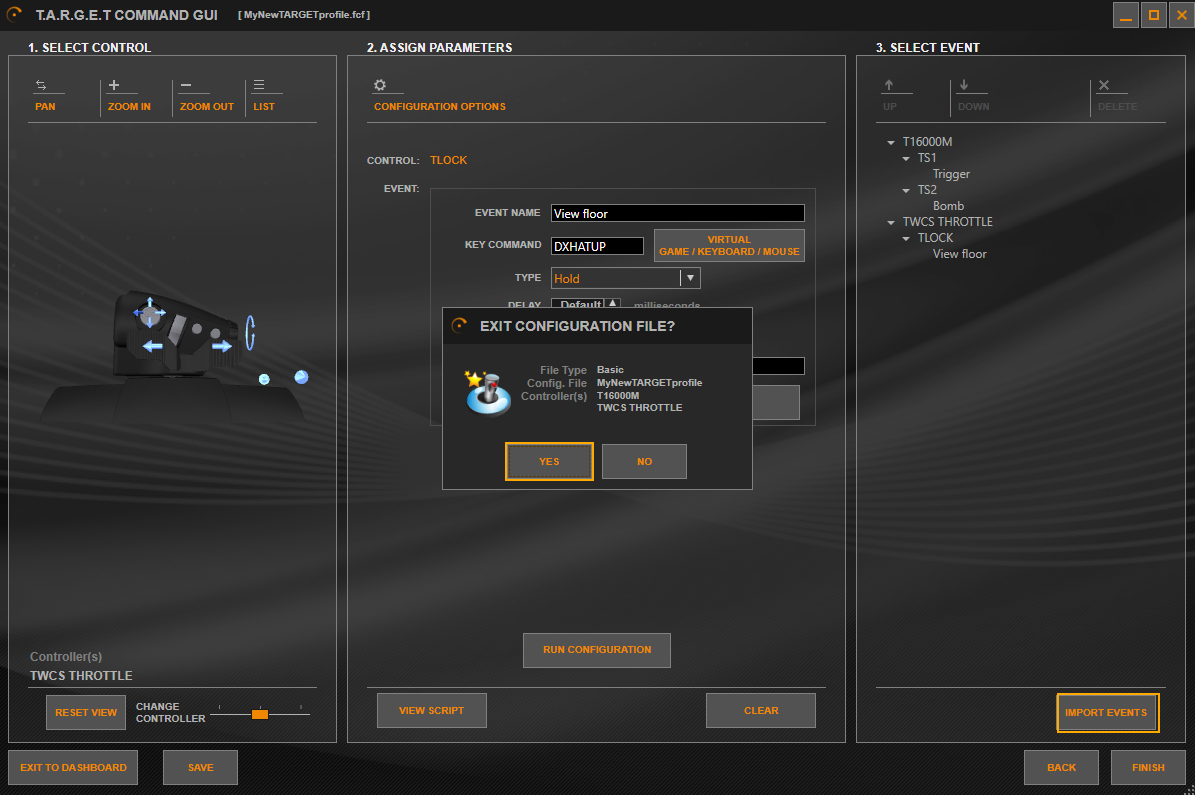
Now you can continue and run your profile to launch your game: T.A.R.G.E.T: first steps and getting started
Enjoy your flight experience!